


Paper waitlists have one real advantage: everyone already knows how to use one. That's also why most restaurants don't switch until a busy night forces the issue.
A digital queue gives guests a place in line they can track from their phone, and notifies them the moment their table's ready. Your host stops managing a crowd and starts seating one party at a time. Setup takes just 5 minutes on any device you already own.
Why do most restaurants still use paper waitlists?
Paper is familiar. It costs nothing. It doesn't crash. These aren't irrational reasons. They're exactly the reasons most operations stick with what works until it doesn't.
The problem is that paper hides its costs. You don't know your walk-away rate because paper can't track what it can't see. Research shows that restaurants lose an estimated $1,500 per week from customers who leave because of wait times. That's not a number paper can help you measure or fix.
Switching to digital and to a dedicated queue management system doesn't mean ripping out your operation. It means adding a layer that makes what you already do faster and more visible.
What does a restaurant digital queue actually do?
A digital queue is software that manages your waiting list in real time. Guests join by scanning a QR code or tapping a link. They see their position and estimated wait time on their phone. When their table's ready, they get a text. Staff manage the whole queue from one screen, on any device they already own.
That's the core of it. No hardware to buy. No app for guests to download. No reservation system to replace. The digital queue handles the front door, nothing else.
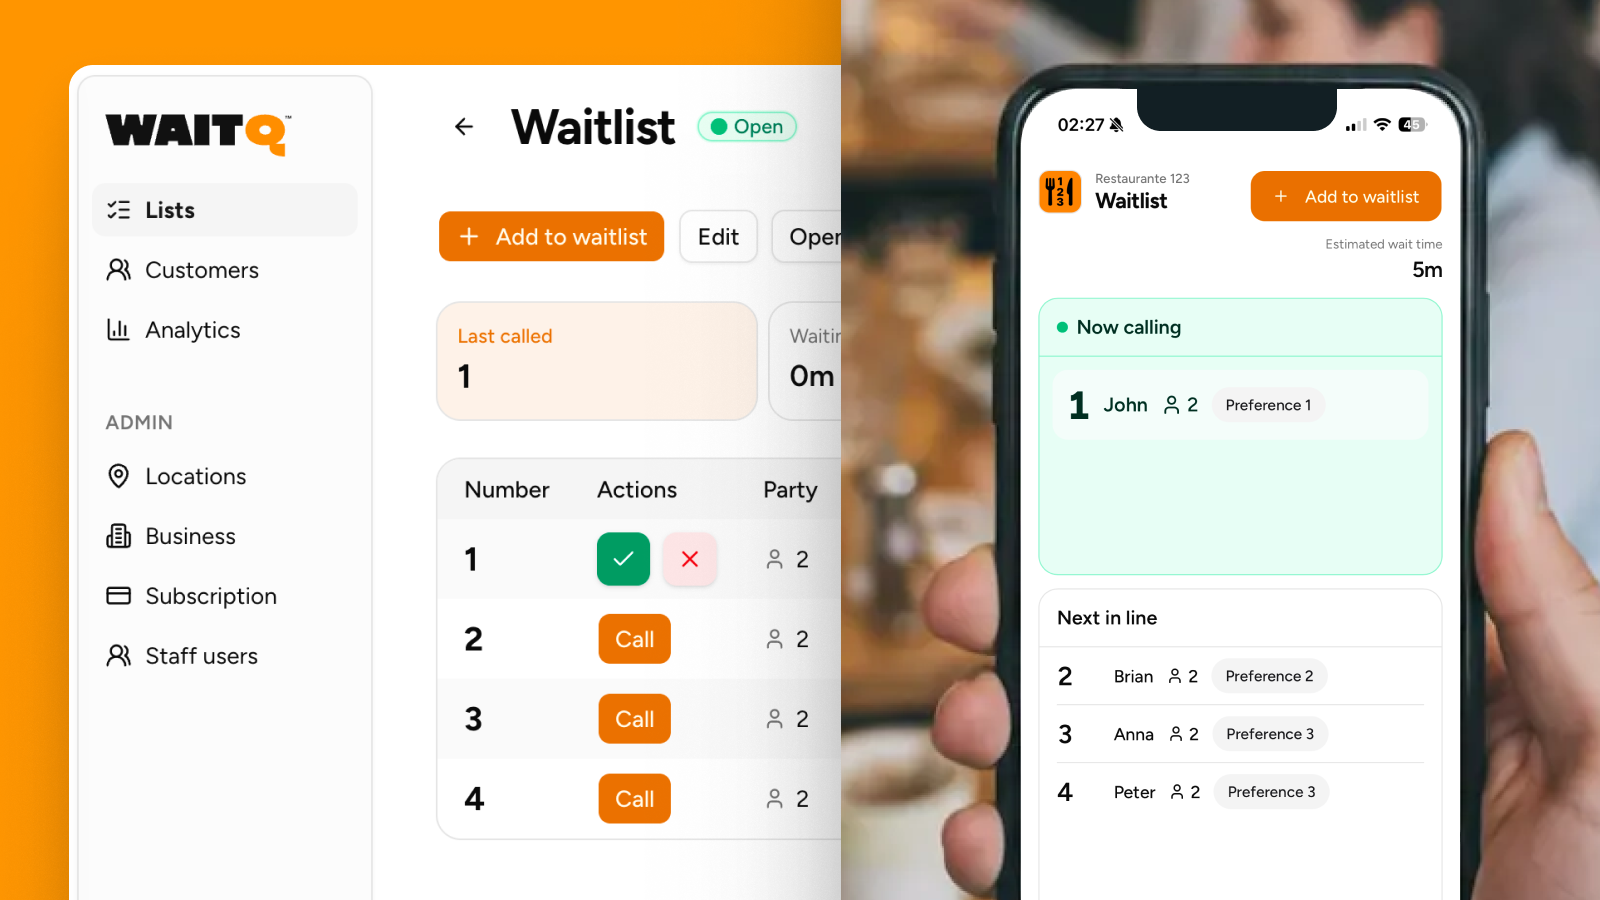
On the staff side, you see every waiting group: name, party size, how long they've been waiting, and their current position. Seating someone is one tap. The next guest gets notified automatically. Your entrance stays clear because guests aren't crowding the host stand waiting to hear their name called.
The most meaningful shift is transparency. When guests can see where they are in the queue, they stop asking. They step outside, grab a drink nearby, or sit in their car. They come back when the text arrives. Studies show that wait time transparency can increase customer retention by 18%, not because the wait got shorter, but because the uncertainty disappeared.
What do you need before you start?
With WaitQ, you only need a device (phone, tablet, or laptop), a Wi-Fi connection, and about 10 minutes. No hardware, no POS integration, no IT consultant. You sign up, configure your queue, display your QR code, and you're live.
If you have a tablet at the host stand, use it as your main management screen. A spare TV near the entrance can show the live queue display so guests see their position without checking their phone, but that's optional.
How to set up a restaurant digital queue, step by step
Step 1: Sign up and create your queue
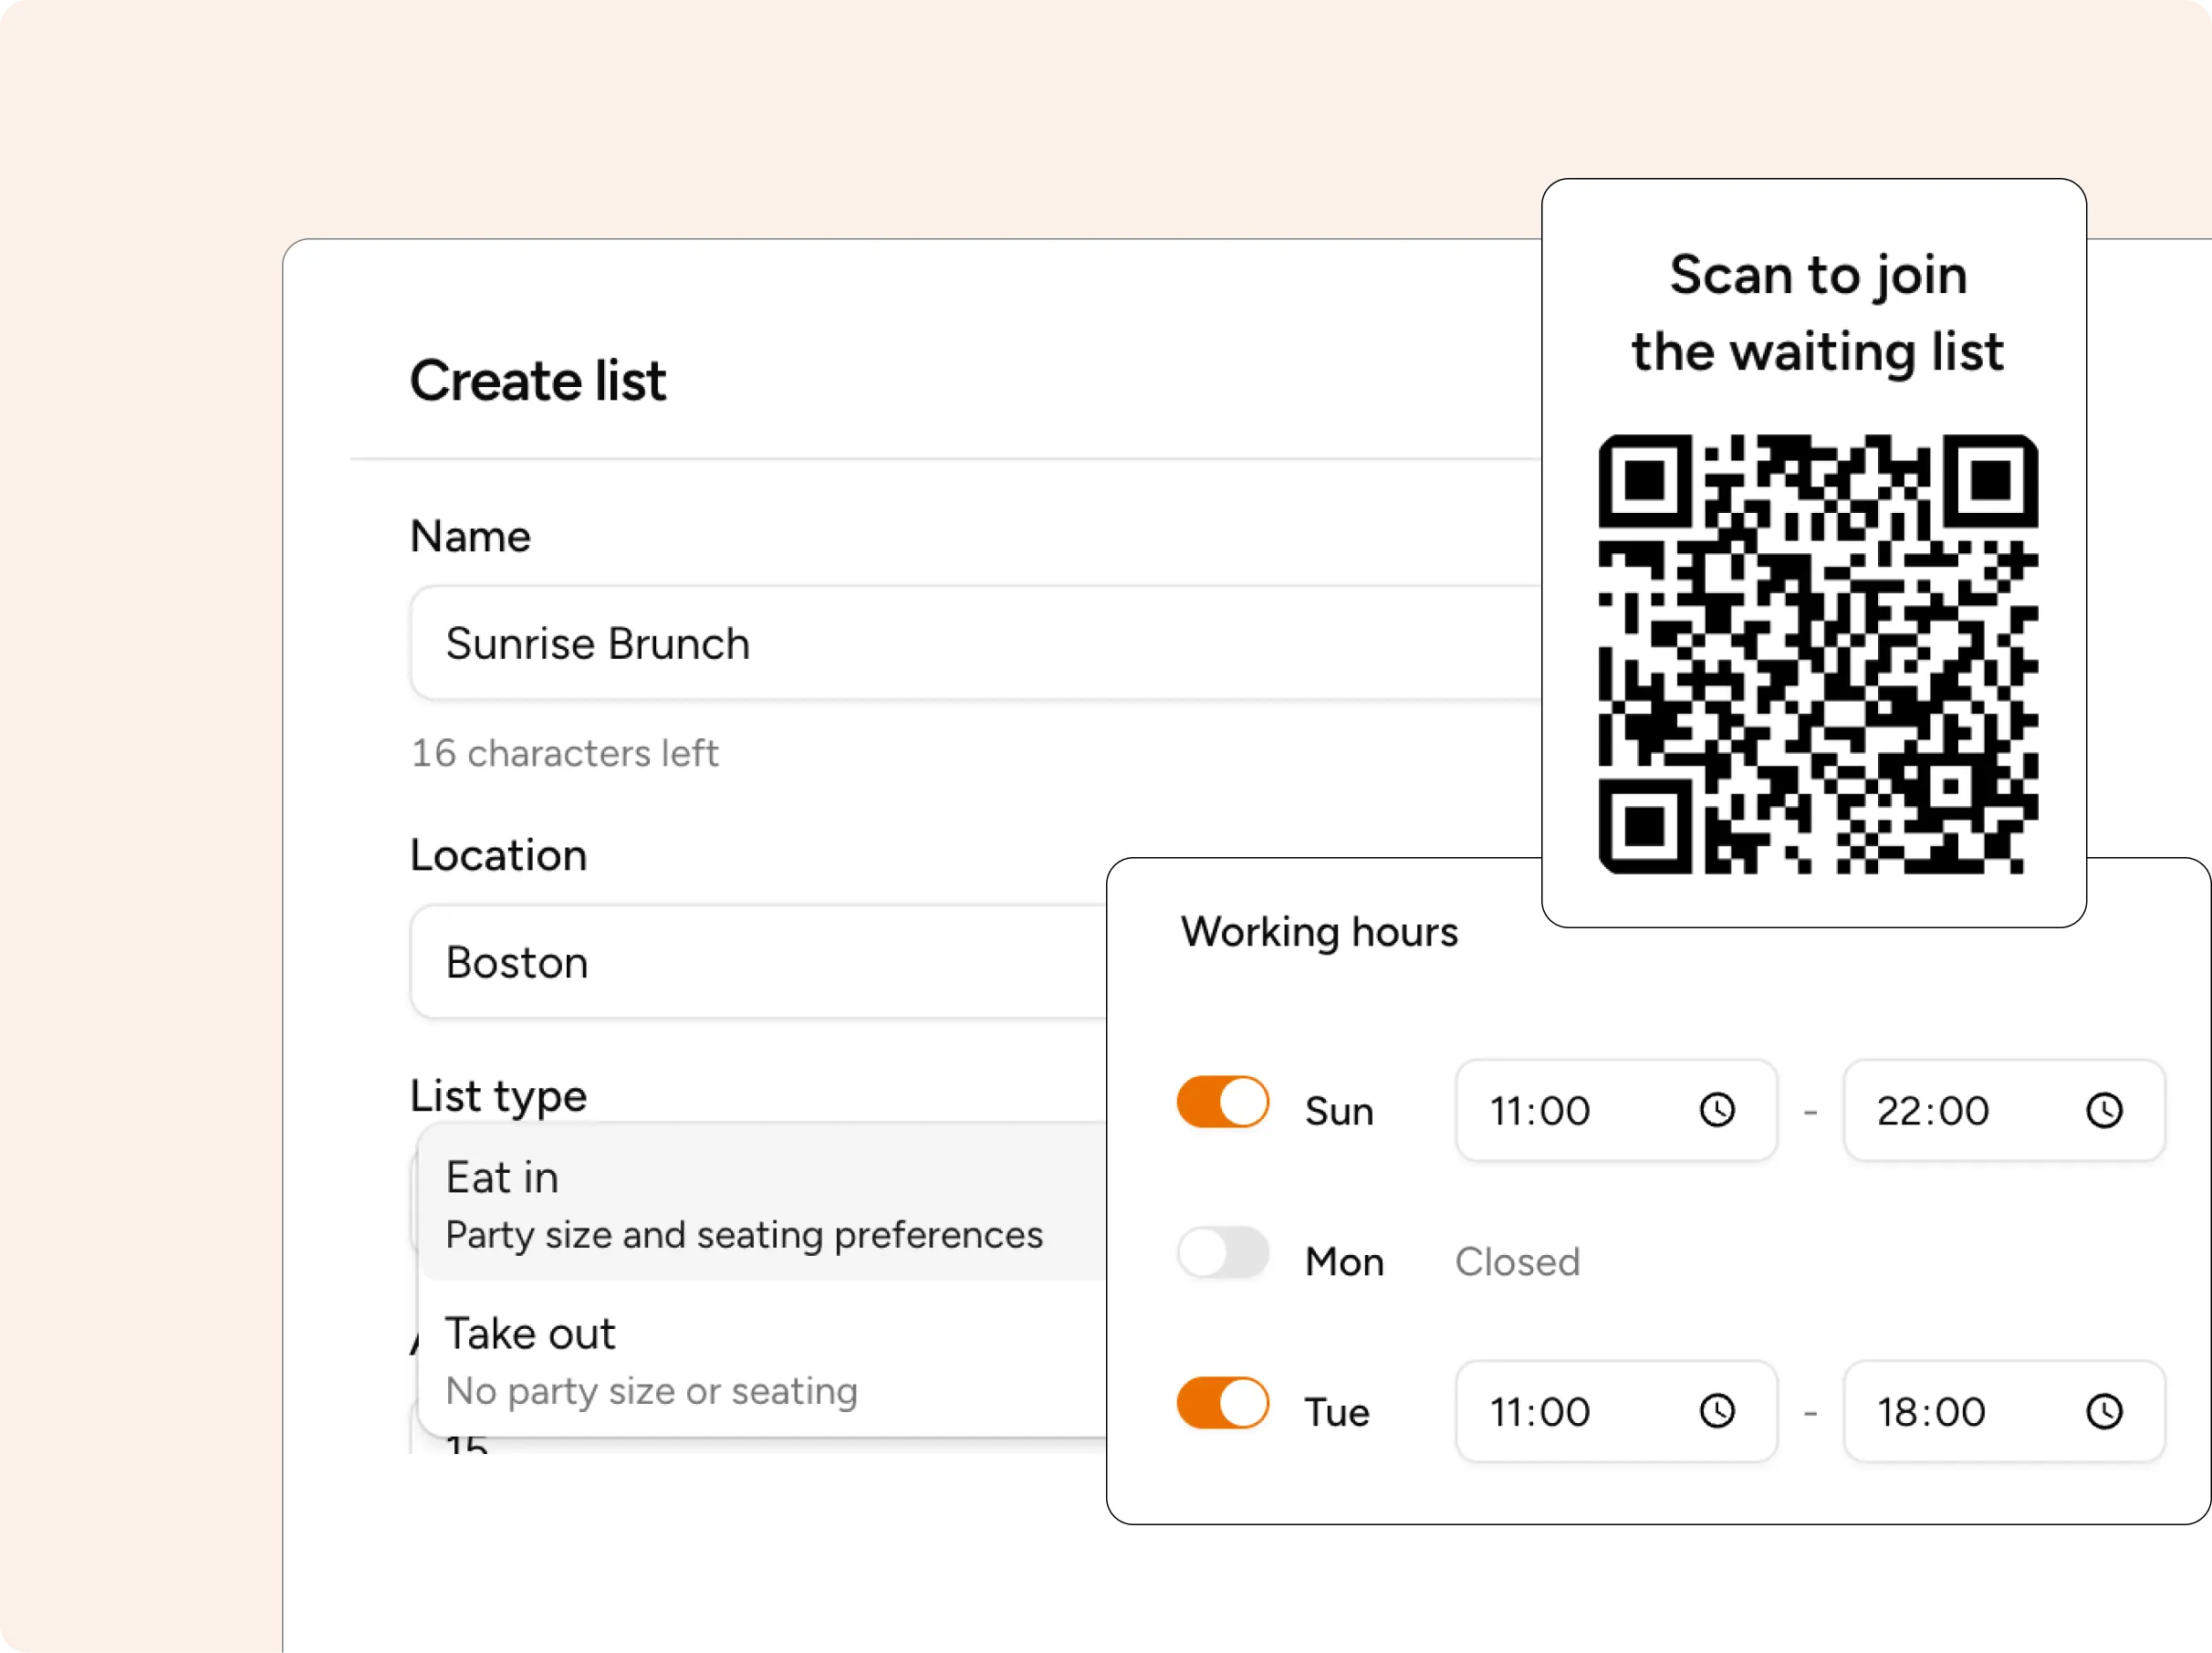
Create an account. You'll name your queue (usually just your restaurant name), set your operating hours, and choose how many parties can be on the list at once.
Step 2: Set your wait time logic
Most tools calculate estimated wait times automatically based on how fast you're seating parties. At setup, enter a baseline estimate: something like "we seat a new table every 15 minutes on average." The system refines this as service moves. Don't overthink it at the start; you can adjust it after your first service.
Step 3: Generate your QR code and place it at the entrance
Your QR code links guests directly to your queue join page. Print it or display it on a screen. Placement matters: put it where guests naturally pause when they arrive. The door, a table tent at the host stand, or your Google Business Profile are all effective spots
If you have a A-frame sign outside, add the QR code there too. Guests who see a queue before walking in can join before they reach the host, which clears the entrance immediately.
Step 4: (Optional) Set up a public display
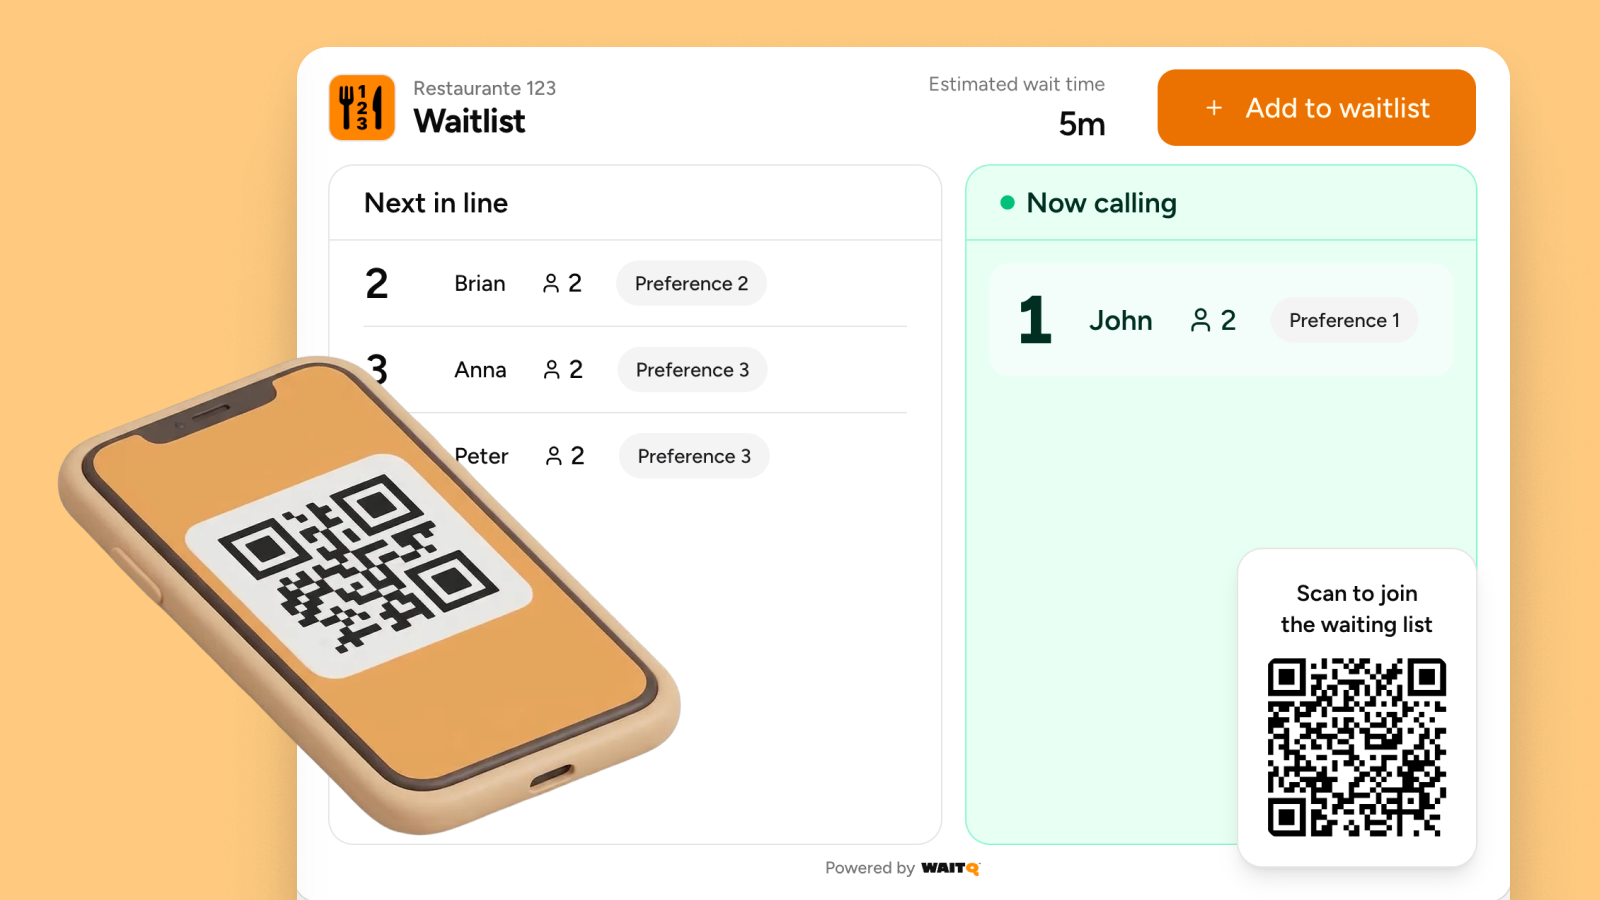
A public display is a screen near the entrance that shows the live queue. Guests see their name move up the list in real time. It reduces "how much longer?" questions more than any other single feature, because guests can see the answer themselves.
This runs in any browser. No extra hardware required.
Step 5: Test it before service
Have one staff member join the queue as a test guest, then seat them. Walk through the full flow: join, wait, notify, seat. Make sure the text arrives and the queue updates correctly. This prevents surprises during a real service.
6 objections that come up, and honest answers
- "My guests won't know how to use it." This is the most common concern and the one that dissolves fastest in practice. Guests don't need an account, an app, or any tech literacy. They scan a QR code and enter their name and party size. If they can take a photo with their phone, they can join your queue. For guests without a smartphone, the host adds them manually.
- "My staff will never learn a new system." Most digital waitlist tools take longer to describe than to learn. If your team can send a text message, they can manage the queue.
- "What if it crashes during a busy service?" The realistic risk isn't a crash, it's a weak Wi-Fi signal at the host stand. A phone on mobile data as a backup solves this entirely. If the system does go down, your host falls back to paper for that service. You haven't removed paper from your operation; you've just stopped relying on it.
- "Paper works fine for us." Paper works until it doesn't. Illegible handwriting during a rush, a spilled drink wiping out an hour of names, or a guest who left 20 minutes ago still on the list. And most importantly: no data to show you which nights are worst or whether your wait times are improving.
- "It's too expensive." Most digital queue tools cost less than $50 per month. If you're losing even one table of guests per busy night to a disorganised wait, the software pays for itself before the end of the first weekend. You can see a comparison of current options on the best restaurant waitlist software roundup.
- "What if guests don't scan the QR code?" Placement and a one-sentence prompt from your host solve most of this. For guests who miss the sign or prefer not to, the host adds them manually, same as today. A few placement spots that work well:
| Placement | Why it works |
| Outside the entrance | Catches guests before they walk in; reduces door crowding immediately |
| Google Business Profile | Guests can join the queue before they leave home |
| Host stand table tent | Catches anyone who missed the door sign |
| Instagram bio or Stories | Worth adding if you have an active following |
What to do in your first week
Run paper and digital in parallel for the first two or three shifts. Guests will ask questions; a few will prefer the old way. That's normal.
After your first Friday or Saturday, check your [waitlist analytics](https://waitq.app/features/analytics): average wait time, guests seated versus guests who left. That drop-off number is your walk-away rate, the metric paper never gave you. Adjust your baseline wait time estimate based on what actually happened.
Most restaurants see walk-aways drop in the first two weeks, not because waits get shorter, but because guests stop leaving when they don't know where they stand.
Setting up a digital queue with WaitQ
WaitQ is designed for exactly this setup scenario: walk-in focused restaurants that want a clean digital queue without rebuilding their front-of-house operation.
Guests join by scanning a QR code at the door. No app download, no account required. They see their position in a branded virtual waiting room and get notified by SMS, WhatsApp, or email when it's their turn. Your host manages everything from one screen on any device you already own.
Setup takes under five minutes. There's no hardware to buy, no staff training session to schedule, and no integration with your POS required.
Start your free trial and set up your first queue today.
The entrance is where revenue starts
Walk-aways don't happen because your food is average or your prices are too high. They happen because guests stood at the door for two minutes with no information and left.
A digital queue fixes that moment. Clear wait times, text notifications when a table's ready, and a calm entrance change what guests experience before they ever see a menu. The technology is already in their pockets.