

A zone represents an area of your location, such as a dining room, terrace, or bar. Each zone has its own layout, and its tables contribute to the location's seating capacity.
This guide shows how to create a zone managed in WaitQ. You need permission to edit the location. The screenshots show an existing location and its zone editor.
1. Open Floor plans in your location settings
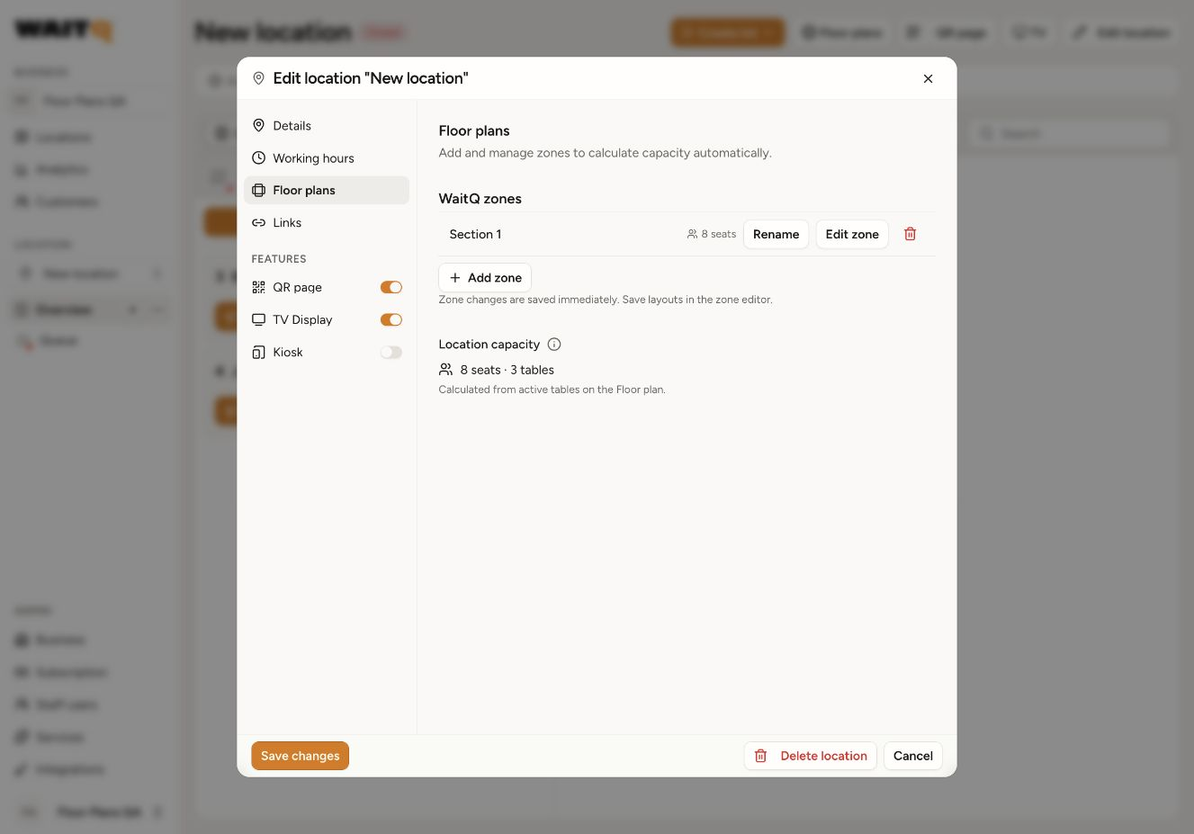
Open Locations, choose your location, and click Edit location. Select Floor plans in the left-hand menu.
If you are setting up a new location, click New location, enter its details, and open the same Floor plans tab before creating it.
The WaitQ zones area lists the zones you manage in WaitQ. If you have not added one yet, it shows No WaitQ zones yet.
2. Add and name your zone
Click Add zone. WaitQ creates a zone with a suggested name, such as Zone 1, and adds a first table with two seats.
Click Rename beside the zone name, enter a name your team will recognise, such as Dining room, Terrace, or Bar, and confirm the change. Use a different name for each zone.
For an existing location, adding or renaming a zone is saved as you confirm the action. For a new location, these changes remain part of the setup: complete the required location details and click Create location first. You can then reopen Edit location → Floor plans to arrange its tables.
3. Arrange your tables and set their capacity
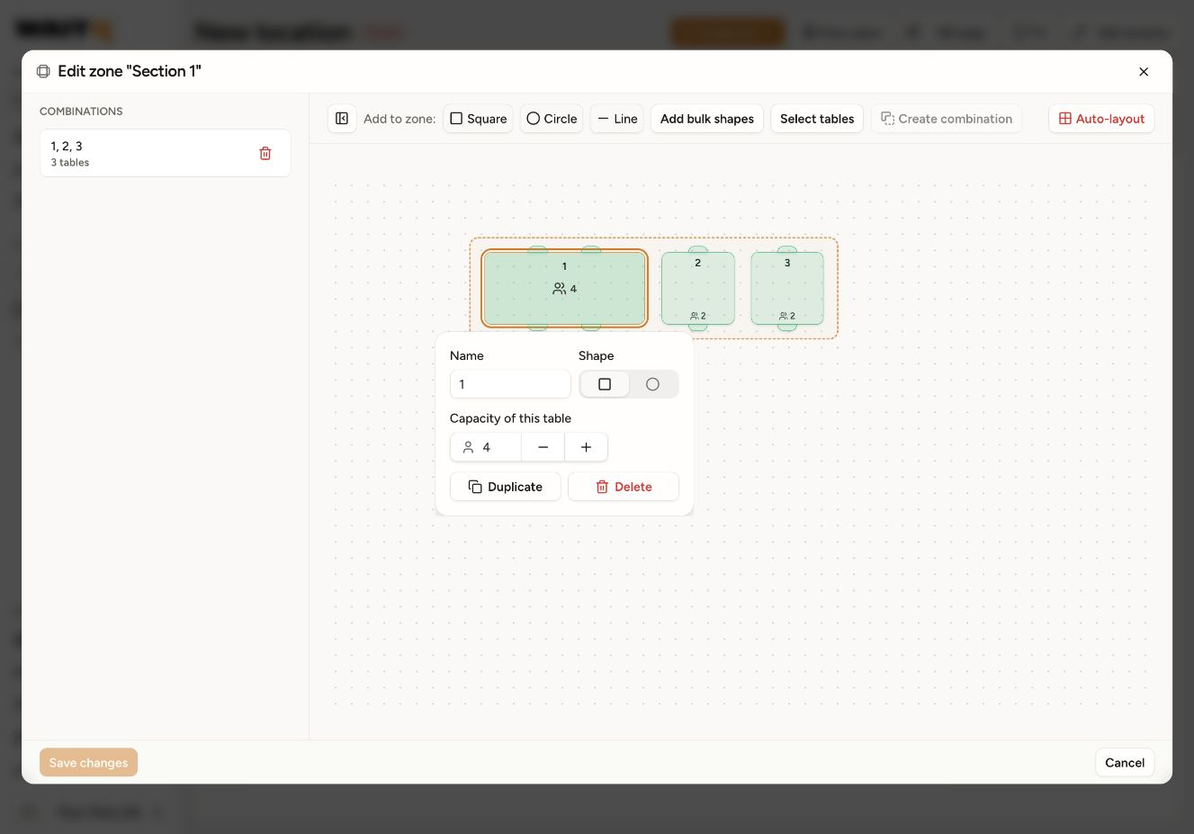
Click Edit zone beside the zone you want to configure.
Use Square or Circle in the Add to zone toolbar to add shapes to the layout. Drag tables into position to match your space, and select a table to edit its details:
- Name: enter the table number or label your team uses.
- Shape: choose a square or circular shape.
- Capacity of this table: set how many guests the table can seat.
You can also Duplicate a table to create another with the same settings. Give each table a unique name within its zone, and leave enough space between shapes so they do not overlap.
4. Add several tables at once, if needed
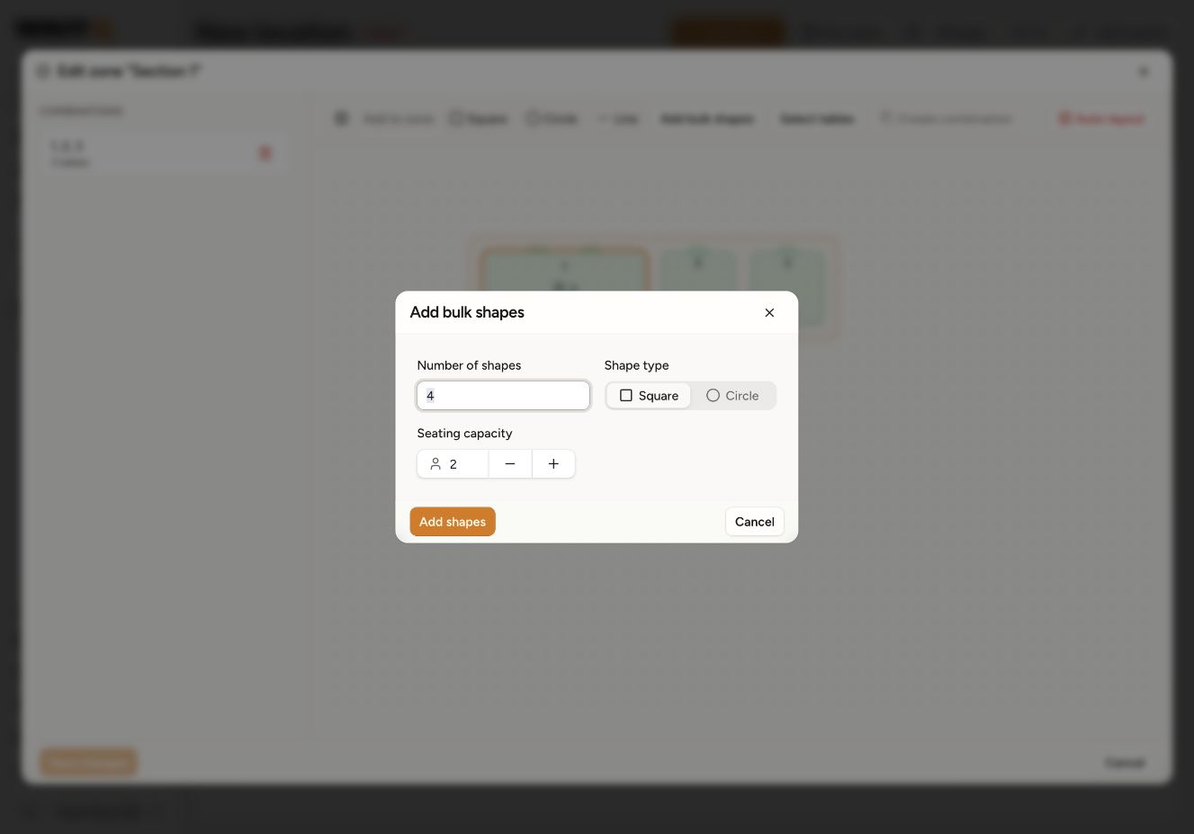
For a larger area, click Add bulk shapes. Enter the Number of shapes, choose the Shape type, and set the Seating capacity for each one. Click Add shapes, then adjust the positions and individual table details as needed.
For example, four tables with two seats each add eight seats to the zone. The seating capacity field applies to each table, not to the whole batch.
Auto-layout can reorganise the shapes in a zone. Review its confirmation before continuing: it rearranges the existing layout and cannot be undone.
5. Save the layout and check capacity
Click Save changes in the zone editor. Back in Floor plans, check the seat count beside the zone and the Location capacity below the zone list.
Once the location uses positioned tables, its capacity is calculated from the active tables across its zones. You manage that capacity by changing tables and their seats, rather than typing a separate total. For example, six active tables with four seats each provide 24 seats.
Each zone needs at least one active table with seats before its layout can be saved. Save any other location settings you changed, then return to the location overview and open Floor plans to view the layout.
What if my zones come from Odoo?
Imported zones appear under Odoo zones in the location's Floor plans settings. Their structure is managed by the integration, so edit those zones and tables in Odoo, then synchronise them with WaitQ. Use Add zone under WaitQ zones when you want to create a separate area managed directly in WaitQ.