

Use a list's Floor plans settings to choose which parts of your location it can use. For example, a terrace queue can use the terrace zone, while another list uses selected indoor tables.
Create the location's zones and tables first. You need permission to edit the list. The screenshots use a queue; the edit window's title follows your list type.
1. Open the list's Floor plans settings
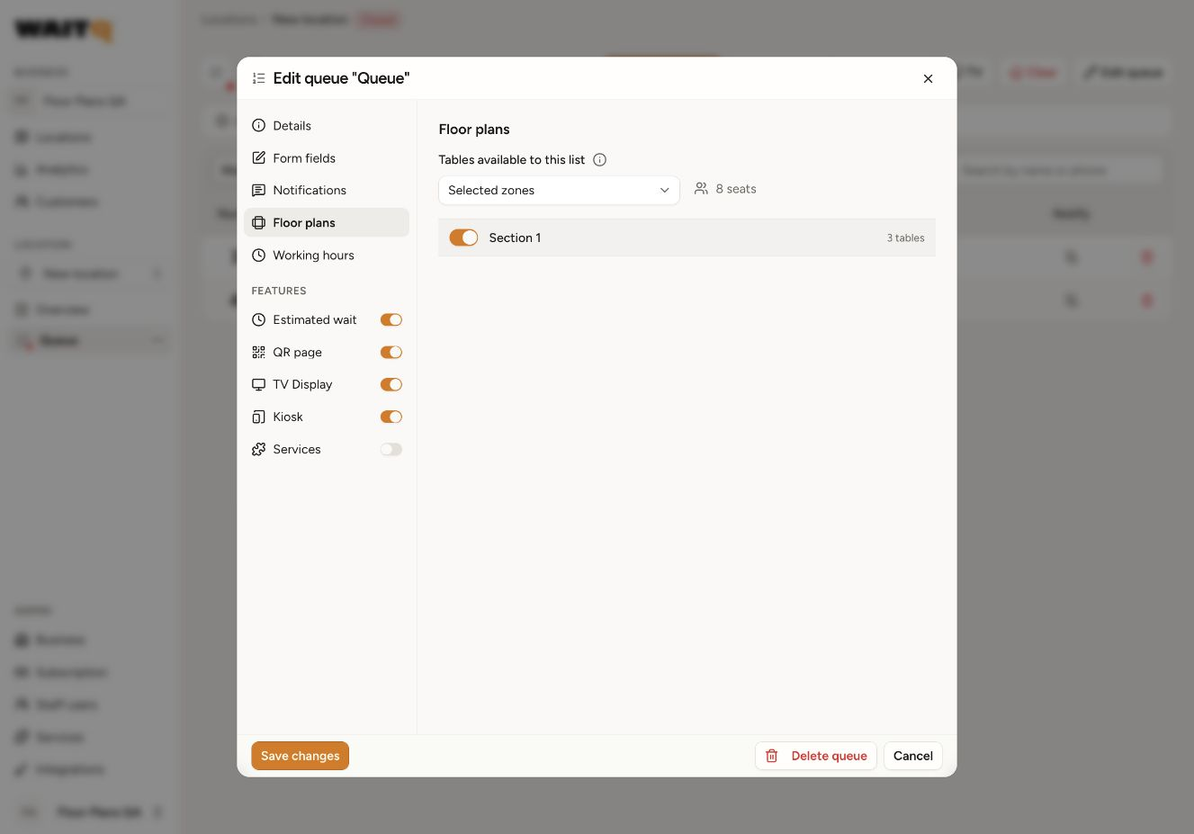
Open the list, choose its edit action, and select Floor plans in the left-hand menu. Find the Tables available to this list selector.
Choose All floor plan tables if the list should use the whole available layout. To narrow it down, choose Selected zones or Selected tables.
2. Choose whole zones or individual tables
With Selected zones, turn on the zones the list should use and turn off those it should not use. Review the table count beside each zone and the seat total.
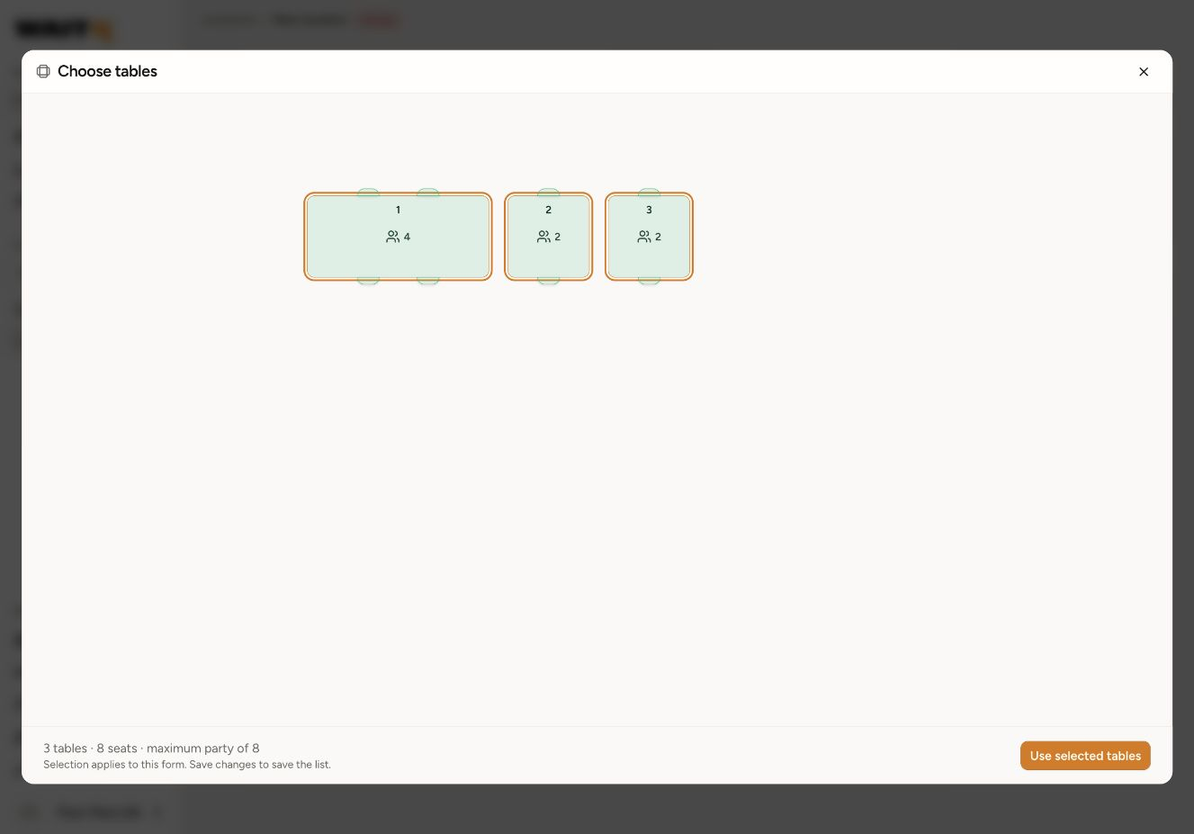
With Selected tables, click Choose tables. Select or deselect tables on the floor map, switching zones if needed. Check the summary showing the number of tables, seats, and maximum party size, then click Use selected tables.
Choose whole zones when the list should follow the area's table membership. Choose individual tables when you need a specific subset. After changing your layout, review this selection to make sure it still matches how the list operates.
3. Save and check the result
Click Save changes in the list editor. Use selected tables closes the table selector; it does not replace saving the list settings.
Closing the table selector without choosing Use selected tables discards that selection. The list settings are saved when you click Save changes.
Tables may be shared with other lists. For capacity and maximum party size, see How floor plan capacity works.