

The Odoo POS integration imports floors and tables into WaitQ as Odoo zones. The connection is shared across your business; each WaitQ location is matched to its Odoo POS separately.
You need access to manage integrations and location settings. Have your Odoo instance URL, database name, and an API key for a user with access to the relevant POS ready. Your instance must be reachable over HTTPS. If Odoo is not enabled for your business, contact WaitQ support.
1. Open the Odoo connection settings
Go to Integrations and click Configure on the Odoo POS card. If a connection already exists, open its connection settings to review it before making changes.
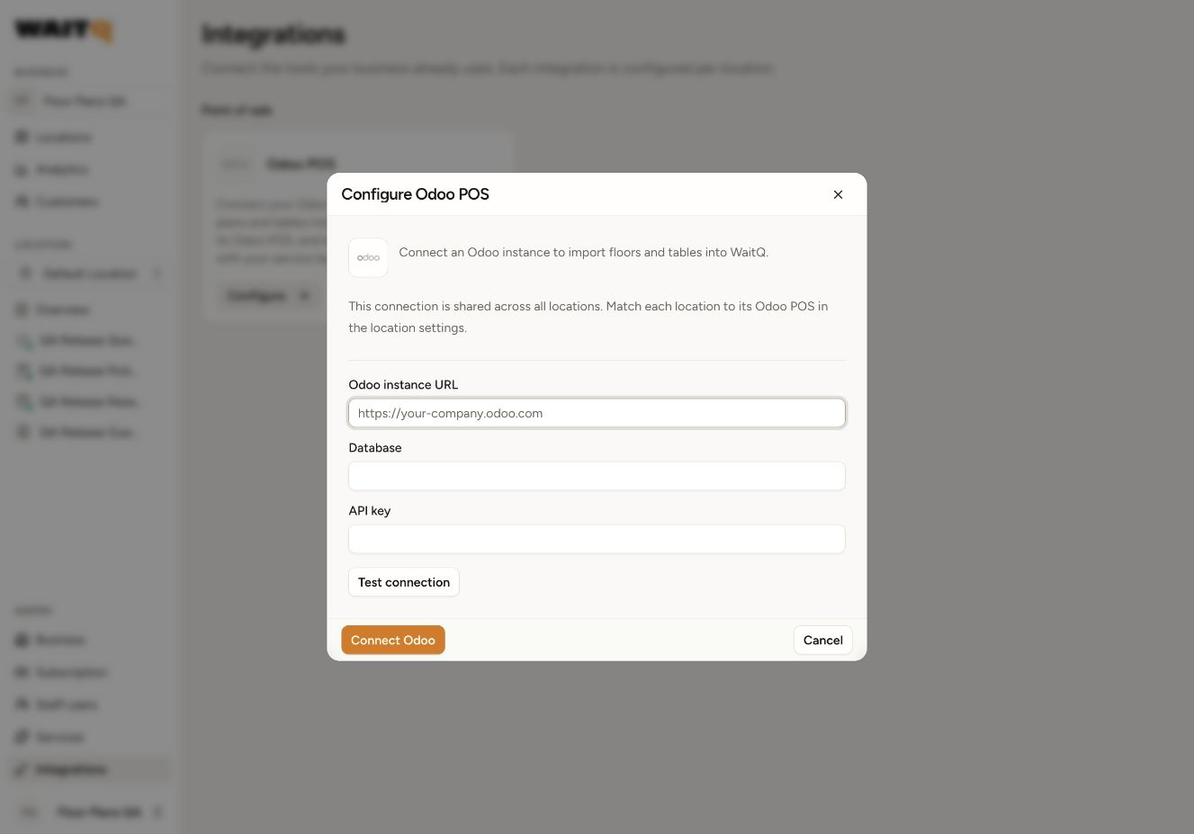
Enter your Odoo instance URL, Database, and API key. Use the database name expected by your Odoo instance; it may differ from your business or restaurant name.
2. Test and save the connection
Click Test connection. If the test fails, check the URL, database name, API key, and the Odoo user's POS access. Correct the details and test again.
Once the connection succeeds, click Connect Odoo. Connecting the business is the first step; you still need to choose which POS each location should import.
WaitQ uses this connection to read floors and tables. This setup does not modify Odoo orders or payments.
3. Match a location and import its tables
Open Locations, choose the location, and select Edit location → Floor plans. In the Odoo area, select the corresponding restaurant or POS and click Import floors and tables.
Wait for the import result. The imported floors appear as Odoo zones, with their tables. Review the zone names, table labels, and seats before using them during service.
An Odoo POS already matched to another WaitQ location cannot be assigned to this location as well. Check the existing mapping if you receive that message.
4. Keep imported zones up to date
Manage the imported floor and table structure in Odoo. After changing it there, return to the location's Odoo controls, check the selected POS, and click Sync from Odoo to import the updated data.
You can also create separate WaitQ zones from the same Floor plans settings. Use How to create a floor plan zone for areas managed directly in WaitQ.
No zones or tables appeared
Confirm that the connection succeeded, that the correct POS is selected, and that the Odoo user can access its floors and tables. Read any import error before retrying. An empty import should not be treated as a completed seating setup.
After importing, review which zones and tables each list can use.