

A table combination records which tables your team can use together for one party. Create combinations that match your physical layout, such as two neighbouring tables that can be joined.
You need permission to edit the location. This guide covers combinations in zones managed in WaitQ.
1. Open the zone editor
Open Edit location → Floor plans and click Edit zone beside the zone containing the tables. If you have not created a zone yet, follow How to create a floor plan zone first.
Check each table's name, position, and seating capacity before defining the combination.
2. Select the tables and create a combination
Click Select tables, then tap or click each table you want to include. Tap a selected table again to remove it from the selection. You can also drag a selection box from an empty part of the canvas when using a pointer.
Select at least two tables, then click Create combination. The combination appears in the Combinations sidebar.
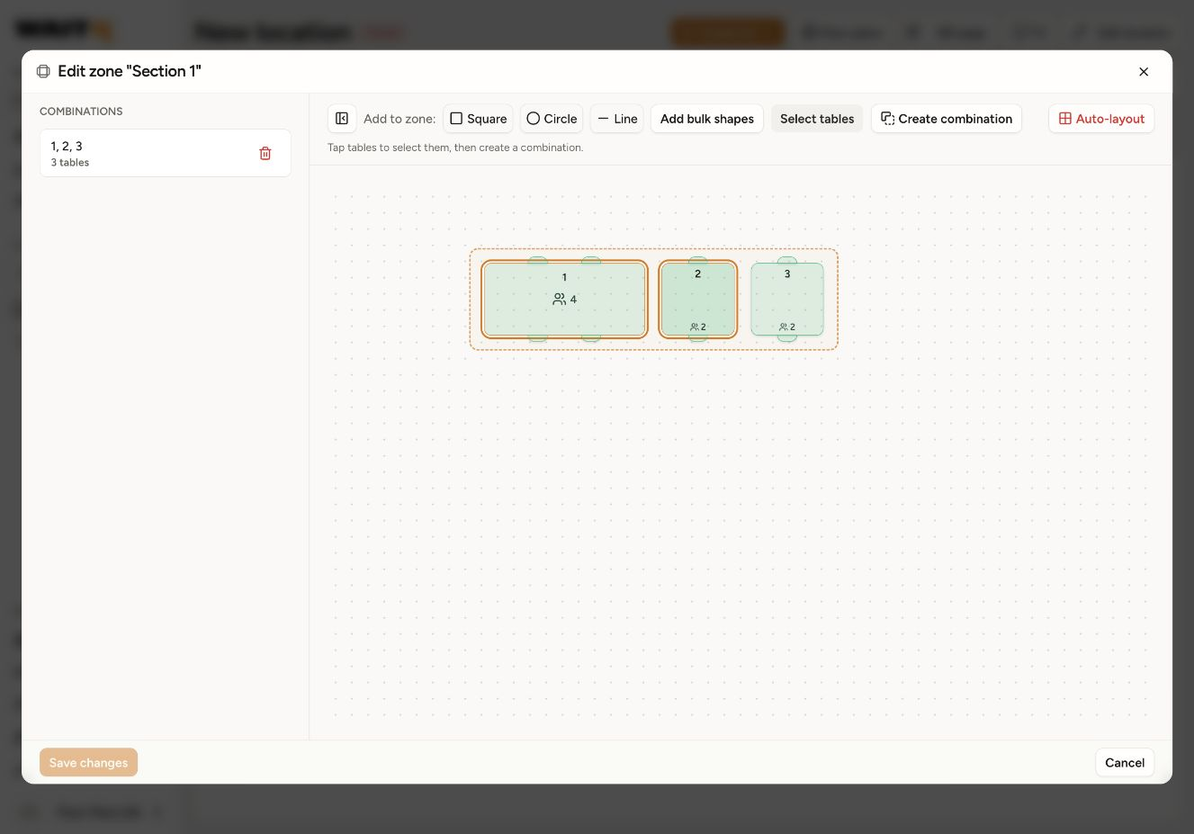
In this example, the selected four-seat and two-seat tables can seat a party of six together.
Click Save changes to save the layout and its combinations.
3. Use the combination for a party
Open the party's table picker or select the party in Floor plans. Choose a suitable combination or the required tables, review the selection, and confirm the assignment.
All member tables need to be usable for the party at the relevant time. Check reservations, occupancy, and the list's table selection if a combination is unavailable.
See How to assign and change tables for the complete assignment workflow.
4. Remove a combination you no longer use
Return to Edit zone, select the combination in the sidebar, and click Remove combination or its delete control. Save your changes.
Removing a combination removes that grouping. Use the individual table's Delete action only if you intend to remove the table itself from the layout.
For seat totals and shared availability, see How floor plan capacity works.